Search This Blog

Wednesday 21 October 2015

My Reprap Prusa i3 Kit [ second of a multipart blog] - The Build!

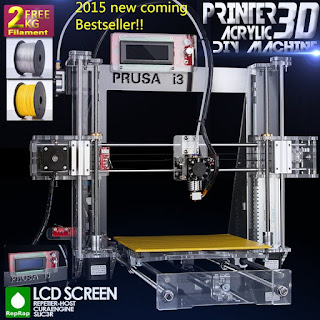
This past weekend, I finally had the time to start building my Reprap Prusa i3 3D Printer,  which I ordered a few weeks ago from  Shenzhen Sunhokey Electronics Co., Ltd. on Aliexpress.com


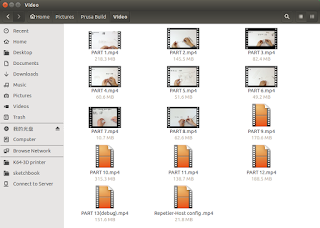
The kit came with a DVD which included about a dozen videos of the step-by-step assembly process.  There is no speech in the videos, just some background music, and periodic overlay of the hardware required to assemble each step.


The videos run at a fairly leisurely pace, but yes... I did have to pause them many times to keep up. 


Here's a sample video to show you what 

the process looks like.

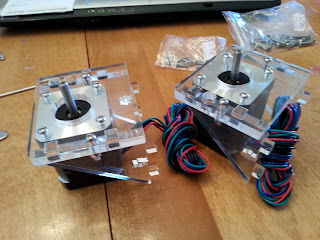
 The build started fairly smoothly, with the X-axis motor block and opposite belt tensioner slider assemblies. (Yeah, I'm too lazy to look up the official names of these two components)


My Assistant and fellow builder - Camden, found himself getting rather tired, early into the build! But, like a trooper, he put in a good couple hours.  Thank you Camden.


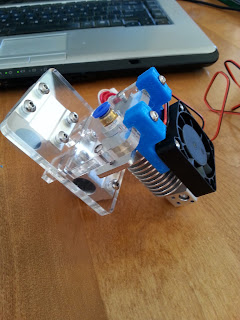
Next up, was the actual hotend carriage assembly.  I'll have to admit, it was very exciting to see these pieces built first.  Good job Shenzhen Sunhokey Electronics Co., Ltd.!  

At first, I wasnt sure how I would feel about the transparent acrylic frame and parts, but as the build progressed, I grew rather fond of it.



Next came Z-Axis Motor brackets, end stops, and then the frame and rails for the Y-Axis heated bed


I wrapped up for the weekend at this point.  Two days of "duration", and about 6 hours of "effort".   


The next three articles over the upcoming week will be: 

1) wiring all of the motors, switches, heaters, etc to the control board and firing it up.   

2) calibrating and troubleshooting (probably not in that order!)  

3) finally running a first print. 


Cheers.


Tuesday 13 October 2015

My Reprap Prusa i3 Kit [ first of a multipart blog] - The unboxing!


I finally bit the bullet, and ordered an actual real 3d Printer from Aliexpress.com.  I've needed an actual functioning mechanical printer to finish my testing and calibration on the Printer firmware that I've been working on for several months now. 

The homemade rig that I cobbled together was not capable of the tolerances that my firmware and electronics could theoretically achieve.

I've put it off until now for many reasons:  Mostly because I'm pig headed and didn't want to admit that I'm not a mechanical genius....

Anyway, a few friends convinced me that this was the right way to go, to finish my ACTUAL project, which was the combination of electronics and associated software/firmware to support it.


The kit I ordered was from    Shenzhen Sunhokey Electronics Co., Ltd.

I must say that I was rather impressed with the speed in which this kit was delivered from China to Canada. From the time I ordered, it took about a business week to process the order, but once I received notification that the package had shipped, It was here with about 4 days.   Thank you Aliexpress.com


Without further ado, let's begin the unpacking:


The Fedex dude pretty much had a hernia dropping this little box at my door.  The packaging said 13.5kg, which is about 30lbs for you Americans... But it felt a lot heavier than that.  Must make a note to self to return (go?) to the gym.


I've removed the thick protective foam top that covered everything to show that this is indeed very well packaged.  


With the box containing the acrylic frame components removed, you can see the electronic and mechanical components nestled tightly within the foam.


The distributor even has little cutouts to cover the stepper motors and linear and threaded rods!


The aluminum bowden extruder was pre-assembled to the stepper motor, and the machining on the hotend looks to be quite good.


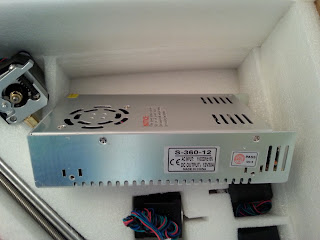
 The power supply is a beefy 12v 30A (360watt) unit.  

My only complaint, is that I was not aware that you had to specify North American AC adapter.  It comes, by default, with a European adapter.  


Yeah, I'm RTFM challenged, ok!?


The Controller board is a MKS Gen 2Z v1.1
This is basically a combination of the Arduino MEGA2560 plus a RAMPS1.4 board.  It still uses the A4988 stepper driver boards. 

Included in this kit is an un-named LCD display with SDCARD and a rotary encoder for menu selection. 


All of the frame components are cut out of clear acrylic. (With a nice pink protective layer... hmmm... should I leave that on? )


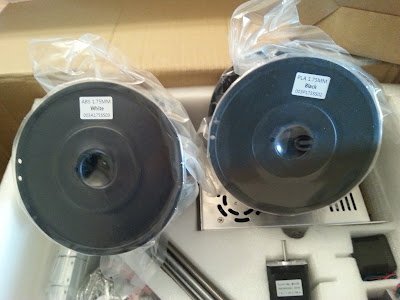
Also included were two 1kg spools of 1.75mm PLA to get me started.
I didn't request any particular colors, so I kind of expected something funky.  

They provided Black and White, which I'm quite happy about.


That's it for now.  

Later in the week, I'll begin assembling and documenting.  

Wish me luck!